
RealWorldWPDev Part 3: Caliburn.Micro and Application Infrastructure
Series Introduction and Outline
This series is going to walk through building a polished, functioning Windows Phone app from start to finish. The app is called Realworld Stocks and the full source code will be available on CodePlex as the series progresses. I’ll be using Mercurial to encourage forking and maybe even pull requests from developers who want to contribute their own real-world solutions.
View the Series Introduction and Outline
Caliburn.Micro
Many Windows Phone Applications use a lightweight MVVM framework for basic infrastructure services. Realworld Stocks is going to use Caliburn.Micro. I have had great success with Caliburn.Micro in my previous Windows Phone and Silverlight apps. CM was created by Rob Eisenberg and is under active development and has a great community and following.
This article is going to walk through a lot of Caliburn.Micro setup, but for the full documentation please see the official project documentation.
Installing Caliburn.Micro from NuGet
If you’ve been following along then you already have NuGet installed. If not, please see Part 2: File –> New Project.
Caliburn.Micro needs to be installed into both the RealWorldStocks.Client.Core and the RealWorldStocks.Client.UI projects.
From the Package Manager Console
To get Caliburn.Micro you can open up the Package Manager console and type the following, but make sure you select the right Default Project. You must install CM into both .Core and .UI projects!

From the Manage NuGet Packages UI
Alternatively you can right-click on both Projects from the Solution Explorer and select “Manage NuGet Packages…”, then click the Online pane and search for Caliburn.Micro. You must install CM into both .Core and .UI projects!

Finishing Caliburn Setup
Once Caliburn.Micro finishes installing it should open up a web page with instructions to finish the configuration.
- Follow the instructions that opened up in Visual Studio
- Make sure your App.xaml and App.xaml.cs are cleared out from the instructions above!
- Delete MainPage.xaml
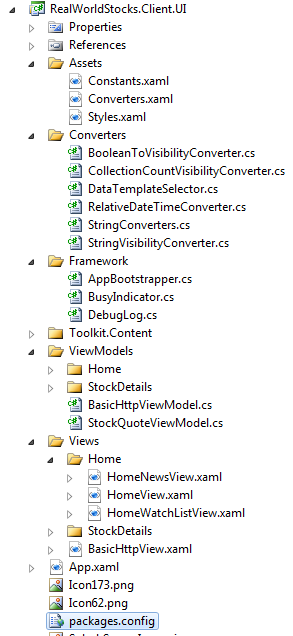
- In RealworldStocks.Client.UI, create a new folder called Framework
- Delete AppBootstrapper.cs
- Create a new AppBootstrapper.cs file in the Framework folder
- Paste the following code into AppBoostrapper.cs
using System;
using System.Collections.Generic;
using System.Diagnostics;
using System.Windows;
using System.Windows.Controls;
using Caliburn.Micro;
using Microsoft.Phone.Controls;
using RealWorldStocks.Client.UI.ViewModels.Home;

namespace RealWorldStocks.Client.UI.Framework
{
    public class AppBootstrapper : PhoneBootstrapper
    {
        PhoneContainer _container;

        protected override void Configure()
        {
            _container = new PhoneContainer(RootFrame);

            _container.RegisterPhoneServices();
            _container.Singleton<HomeViewModel>();
        }

        protected override void OnUnhandledException(object sender, ApplicationUnhandledExceptionEventArgs e)
        {
            if (Debugger.IsAttached)
            {
                Debugger.Break();
                e.Handled = true;
            }
            else
            {
                MessageBox.Show("An unexpected error occured, sorry about the troubles.", "Oops...", MessageBoxButton.OK);
                e.Handled = true;
            }

            base.OnUnhandledException(sender, e);
        }

        protected override object GetInstance(Type service, string key)
        {
            return _container.GetInstance(service, key);
        }

        protected override IEnumerable<object> GetAllInstances(Type service)
        {
            return _container.GetAllInstances(service);
        }

        protected override void BuildUp(object instance)
        {
            _container.BuildUp(instance);
        }
    }
}
- Since we moved the AppBoostrapper into the RealWorldStocks.Client.UI.Framework namespace we need to update our App.xaml. Paste the following into your App.xaml
<Application xmlns="https://schemas.microsoft.com/winfx/2006/xaml/presentation"
             xmlns:x="https://schemas.microsoft.com/winfx/2006/xaml"
             xmlns:Framework="clr-namespace:RealWorldStocks.Client.UI.Framework"
             x:Class="RealWorldStocks.Client.UI.App">
    <Application.Resources>
        <ResourceDictionary>
            <ResourceDictionary.MergedDictionaries>
                <ResourceDictionary Source="Assets/Constants.xaml"/>
                <ResourceDictionary Source="Assets/Styles.xaml"/>
                <ResourceDictionary Source="Assets/Converters.xaml"/>
            </ResourceDictionary.MergedDictionaries>

            <Framework:AppBootstrapper x:Key="bootstrapper" />
        </ResourceDictionary>
    </Application.Resources>
</Application>
Working around a small NuGet bug
At the time of this writing there appears to be a bug in the NuGet package which thinks my project is a Silverlight project (instead of Windows Phone).
If the NuGet package created a ShellViewModel.cs in your project, then you will need to take the following steps:
- Delete ShellViewModel.cs
- Delete IShell.cs
- Delete ShellView.xaml
Application Infrastructure
 The final pieces of our infrastructure include the following:
Value Converters
I have a set of IValueConverters that I have used on all of my Windows Phone projects. They can be viewed from the CodePlex source code.
Assets
Assets are a set of ResourceDictionaries that contain the resources used throughout the application. They can be viewed from the CodePlex source code.
Constants.xaml
Defines variables like “AppName” so it can be used on pages <TextBlock Text=”{StaticResource AppName}” />
Converters.xaml
Defines the set of converters used in our project
Styles.xaml
Defines a set of reusable styles
ViewModels
ViewModels define the logic for all of our views. They take advantage of XAML’s great binding mechanisms and Caliburn’s ActionMessages to control how our views behave. Later in the series we will deep dive into Views and ViewModels.
To get started, make sure you have a ViewModels folder, then right-click and select New Item…, add a Class file called **HomeViewModel.cs **
public class HomeViewModel : Screen
{
    public HomeViewModel()
    {
        DisplayName = "Home";
    }
}
Views
Views are your .xaml Pages and UserControls. Later in the series we will deep dive into Views and ViewModels.
To get started, make sure you have a Views folder, then right-click and select New Item…, add a Windows Phone Portrait Page called HomeView.xaml
WMAppManifest.xml
Lastly, you need to update the WMAppManifest to tell it what page should load when the app is launched.
Open WMAppManifest.xml and set the NavigationPage to your primary page
<DefaultTask Name="_default" NavigationPage="Views/HomeView.xaml" />
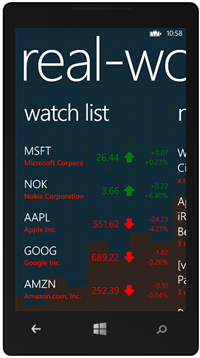
Run it!
Now we’re getting somewhere. We have the majority of our application infrastructure in place and have our first View and ViewModel. If you press F5 now it should launch right into the HomeView!
Problems?
If the app exits immediately after launching check the following:
- WPAppManifest NavigationPage points at a .xaml file that actually exists
- Make sure you App.xaml.cs has nothing but InitializeComponent() and App.xaml only has the Bootstrapper in it. See the Caliburn.Micro documentation for more
- Check the namespaces in your ViewModels and Views and make sure ViewModels and Views namespaces match up
- For further Caliburn troubleshooting check the Caliburn.Micro documentation


Leave a Comment