
Managed AddIn Framework (System.AddIn) with WPF
Disclaimer: This post is mainly for my own reference. Quite honestly, the Managed AddIn Framework (henceforth known as MAF), is a rather complex beast, and I simply cannot remember all the steps necessary to utilize it properly without a small reference guide. This post will cover the complete step-by-step tutorial of every action that a developer must perform to utilize the AddIn framework. It will not be a complete overview of what MAF is or how all the parts tie together. I will do my best to cover these things, but I have also included some very helpful reference material that will cover these topics better than I ever could.
Before continuing
This post does not cover all the intricacies and overall design of the Managed AddIn framework. While it will in fact walk you through a step-by-step creation of a WPF app that supports AddIns, it will not fully explain what the various MAF pipeline projects are used for (or the pipeline itself for that matter). It would be in your best interest to watch this excellent screencast from Daniel Roth first.
What is it?
MAF is the (much overdue, in my opinion) plugin/addin framework for .NET applications. It allows application developers to expose very simple extensibility points that allows third party developers to enhance your product. Common examples are creating an email client and relying on AddIns for services like Spell Checking, Virus Scanning, etc. Whether plugins are a core part of your application or merely a small feature, the Managed AddIn Framework should be employed to your advantage from here on out.
Note: System.AddIn is a .NET 3.5 assembly, and as such means that you must target .NETFX 3.5 to utilize it.
MAF consists of the following assemblies
- System.AddIn
- System.AddIn.Contract
MAF gives your application the following benefits (at the expense of extra complexity and a steeper learning curve)
- Discovery – Find addins at runtime
- Activation – Load an addin at runtime
- Versioning - Backwards/forward compatibility
- Isolation – Load addins into separate AppDomains/Processes so they cannot crash they whole app, among other reasons
- Lifetime Management – MAF will handle addin lifetimes and memory/AppDomain management
- Sandboxing – Load addins with specific permission sets like “Internet”
- Unloading – Unload an addin without worrying about tedious AppDomain management
Our goal
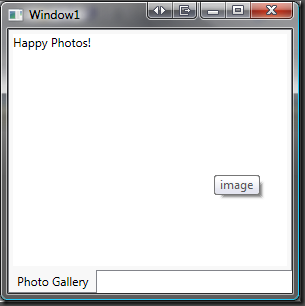
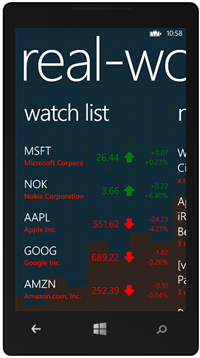
By the end of this article you should be able to produce something like below. I know it doesn’t look like much, but it’s tackling a very specific scenario for a hobby project I am working on currently. The goal is to create a host WPF app that allows me (or third parties) to write addins for the host that will render custom WPF UI and allow interaction with the rest of the application.
Below we have a very basic WPF window with a TabControl. The cool thing about this application is that the TabControl is databound to an AddIn collection – the tabs themselves as well as the tab content are entirely rendered at runtime from an AddIn via the Managed AddIn framework.
Step 1 – Define Contact Interface and utilize Pipeline Builder
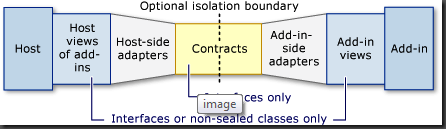
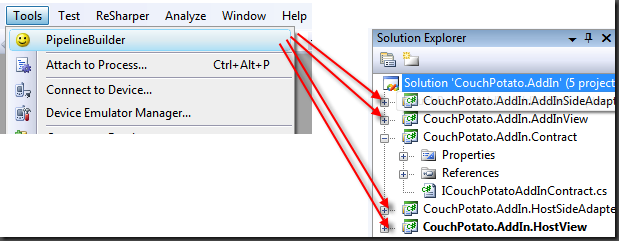
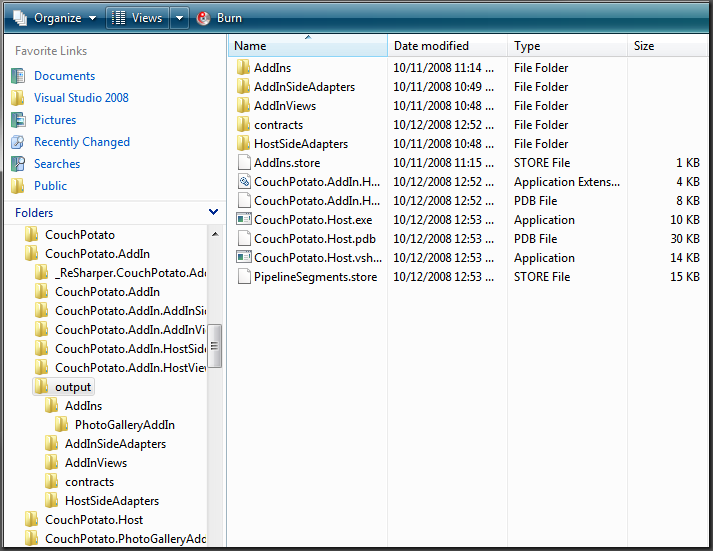
The first thing you need to be (painfully) aware of, is the project/directory structure that the MAF Pipeline requires. There is some flexibility here but not a whole lot of wiggle room. Thankfully, the only project I have to concern myself with is the Contract assembly (CouchPotato.AddIn.Contract below). With a proper directory structure in place you can use a tool that the MAF team released called Pipeline Builder to generate the necessary MAF projects for you automatically. The arrows below indicate which projects were generated by Pipeline Builder – it is important to understand that the only project/code I actually wrote in this entire solution is the ICouchPotatoAddInContract.cs. Please see the screencast above or the resources below for more details on Pipeline Builder.
Ok let’s get started. The following instructions will create the optimal directory/project structure for a MAF-based application.
- Prepare the directory structure for your MAF application by creating a parent folder in your Visual Studio 2008\Projects folder (or wherever you choose). I named my folder “CouchPotato”
- Next, create a new Class Library project for your AddIn contact, I chose CouchPotato.AddIn.Contract. Create this project inside your parent folder from Step 1.
- Add reference to System.AddIn and System.AddIn.Contract
- Hopefully you have installed Pipeline Builder by now, so you should add reference to “C:\Program Files\Microsoft\Visual Studio Pipeline Builder\PipelineHints.dll”
- This assembly does not need to be deployed with your application. It is only used by the Pipeline Builder during debugging
- Create your contract interface, I chose the following
[AddInContract]
public interface ICouchPotatoAddInContract : IContract
{
    string Name { get; }
    string Description { get; }
    void Initialize();
    INativeHandleContract HomeScreen { get; }
}
- For now, don’t worry about INativeHandleContract. This is an interface that the MAF team added to support much better UI passing between isolation boundaries (AppDomains). This interface allows an AddIn to very easily pass direct UI elements to the host application, which is very important for my application.
- Notice that MAF requires two rules for your AddIn Contracts: first you must derive from the IContact interface from System.AddIn.Contract assembly, as well as add the [AddInContract] attribute also from the same assembly.
- Next, I chose to specify some naming ‘hints’ to the Pipeline builder. These hints tell the Pipeline Builder utility what to name the 4 assemblies that it will be generating for me. Click here to view all available Pipeline Hints
[assembly: PipelineHints.SegmentAssemblyName(PipelineHints.PipelineSegment.HostView, "CouchPotato.AddIn.HostView")]
[assembly: PipelineHints.SegmentAssemblyName(PipelineHints.PipelineSegment.AddInView, "CouchPotato.AddIn.AddInView")]
[assembly: PipelineHints.SegmentAssemblyName(PipelineHints.PipelineSegment.HostSideAdapter, "CouchPotato.AddIn.HostSideAdapters")]
[assembly: PipelineHints.SegmentAssemblyName(PipelineHints.PipelineSegment.AddInSideAdapter, "CouchPotato.AddIn.AddInSideAdapters")]
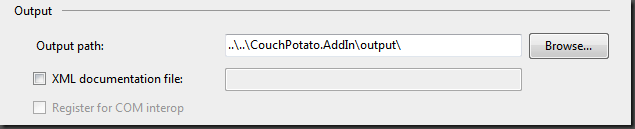
- We are almost done, but before we build this project we need to change to output path from the default “/bin/Debug” to “../output/Contracts”. For further explanation on this please see the excellent screencast by Daniel Moth.

- Ok we are ready to build, go ahead and build your project.
- This step is important because the Pipeline builder does not examine your source code to generate the dependent assemblies, only the compiled code via reflection.
- Launch the Pipeline Builder from the Tools menu. Default settings should be fine if you have been following along. Pressing OK should generate 4 new projects to your solution, as seen above.
- Note: I believe this is a bug I ran into with the Pipeline Builder CTP, but in my case I was forced to rename the generated Assembly Name/Default Namespace after the first generation as seen below. Take a look at your projects and verify these settings. Once you change them the first time you will not have to do it again, even if you use Pipeline builder again (and you will).

Step 2 – Create our Host WPF Application
Now that our AddIn Pipeline is complete let’s create the host application.
Open a new instance of Visual Studio and create a new WPF Project, create it inside the same parent folder that we used for our Contracts project.
- Add reference to System.AddIn
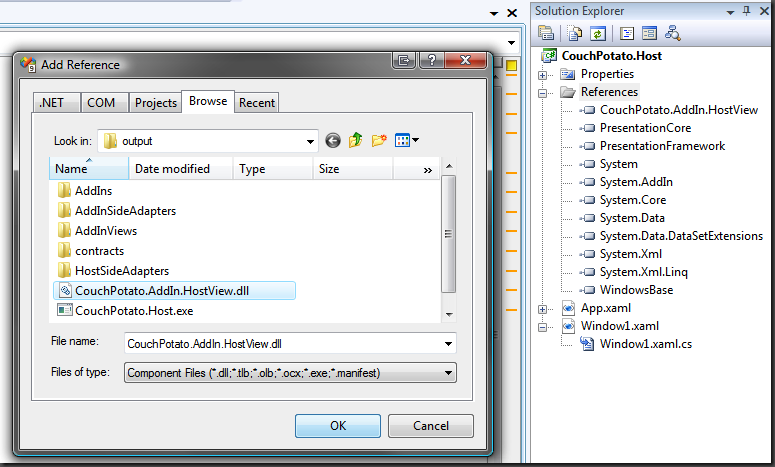
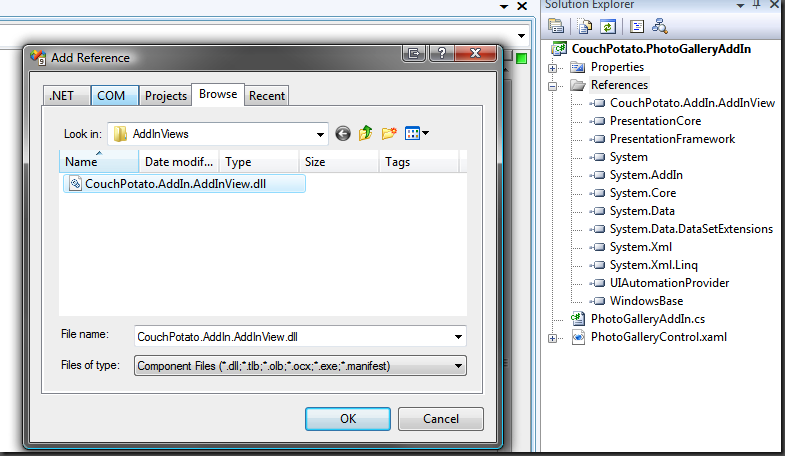
- Add reference to your HostView assembly that can be found by browsing to “../output/CouchPotato.AddIn.HostView.dll”
- Important: Make sure you set CopyLocal=false for your HostView assembly
- Finally, change your build output path to the root output directory
- I have created a very simple WPF Window with a TabControl. As you can see I am taking advantage of the ContentPresenter control to handle rending of the AddIn control for me. This is a great trick
<TabControl x:Name="PluginContainer" TabStripPlacement="Bottom">
    <TabControl.ItemTemplate>
        <DataTemplate>
            <StackPanel>
                <TextBlock Text="{Binding Name}" />
            </StackPanel>
        </DataTemplate>
    </TabControl.ItemTemplate>
    <TabControl.ContentTemplate>
        <DataTemplate>
            <Grid>
                <ContentPresenter Content="{Binding HomeScreen}" />
            </Grid>
        </DataTemplate>
    </TabControl.ContentTemplate>
</TabControl>
- That is the last of our host configuration. Last thing we need to do is Update our AddInStore and load some AddIns (unfortunately, we don’t have any yet, please see Step 3 :)
public Window1()
{
    InitializeComponent();

    AddInStore.Update(PipelineStoreLocation.ApplicationBase);
    Collection<AddInToken> addinTokens = AddInStore.FindAddIns(typeof(ICouchPotatoAddIn), PipelineStoreLocation.ApplicationBase);

    ObservableCollection<ICouchPotatoAddIn> addins = new ObservableCollection<ICouchPotatoAddIn>();
    foreach (AddInToken addinToken in addinTokens)
    {
        ICouchPotatoAddIn addin = addinToken.Activate<ICouchPotatoAddIn>(AddInSecurityLevel.Internet);
        addins.Add(addin);
    }

    PluginContainer.ItemsSource = addins;
}
Step 3 – Create our first AddIn
For this last step we are going to create a fake PhotoGallery AddIn.
- Open a new instance of Visual Studio and create a new Class Library project, create it inside the same parent folder that we used for our Contracts project.
- Add reference System.AddIn
- If this is a WPF Addin, add reference PresentationFramework for FrameworkElement
- Add reference to your AddInView assembly that can be found by browsing to “../output/AddInViews/AddInView.dll”
- Important: Make sure you set CopyLocal=false for your AddInView assembly
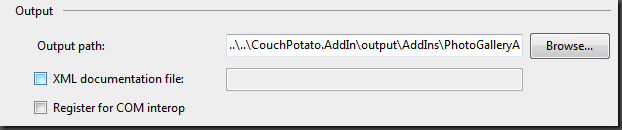
Set the AddIn output to a specific directory within the output/AddIns folder, for example:
- ..\output\AddIns\PhotoGalleryAddIn
- Now that configuration is complete let’s create our UserControl that will represent the UI for the AddIn. Simply right-click on the project and Add New Item, select WPF User Control, add any UI that you choose.
<UserControl x:Class="CouchPotato.PhotoGalleryAddIn.PhotoGalleryControl"
    xmlns="https://schemas.microsoft.com/winfx/2006/xaml/presentation"
    xmlns:x="https://schemas.microsoft.com/winfx/2006/xaml"
    Height="300" Width="300">
    <Grid>
        <TextBlock Text="Happy Photos!" />
    </Grid>
</UserControl>
Lastly, create a the WeatherAddIn.cs file
- Implement the ICouchPotatoAddIn interface
- Add the [AddIn] attribute to describe the AddIn.
- As you can see below, the Pipeline Builder has turned the INativeHandleContract interface into a FrameworkElement for us! This is very handy, as it will allow seamless calls from UI elements across AppDomains without us knowing anything about it! All we have to do is return any FrameworkElement to satisfy the contract, in this case, a WPF UserControl does in fact derive from FrameworkElement, as does just about anything in the WPF visual namespace.
[AddIn("Photo Gallery", Version = "1.0.0.0")]
public class PhotoGalleryAddin : ICouchPotatoAddIn
{
    private readonly PhotoGalleryControl _control;

    public PhotoGalleryAddin()
    {
        _control = new PhotoGalleryControl();
    }

    public string Name
    {
        get { return "Photo Gallery"; }
    }

    public string Description
    {
        get { return "View all your photos"; }
    }

    public void Initialize()
    {
    }

    public FrameworkElement HomeScreen
    {
        get { return _control; }
    }
}
Run it!
With any luck, hopefully you are able to run your host application and find the AddIn you created. There are a lot of working parts when you use the Managed AddIn Framework, and as such, there are many points of failure. As you can see there is a slight learning curve to utilize MAF but hopefully after this article and the Daniel Moth screencasts you should be pretty comfortable with the framework.


Leave a Comment