Share your ReSharper templates across all your dev machines

I’m going to assume that most of you reading my blog are passionate about software and do some developing in your spare time. If you’re a consultant, you probably do most of your work on a laptop – perhaps using the same laptop for office and hobbyist development. Others among you might have a laptop and a desktop, or maybe you’re like me and have a laptop and multiple desktops. All with Visual Studio and ReSharper on them – of course.
About 2 years ago I got really big into ReSharper Live Templates – I started writing them for everything. To date, my most commonly used are probably “tm” to generate a Test Method in AAA syntax, and “jsdr” for a quick block of <script> tags and some jQuery $(document).ready code.
Over time I would naturally tweak the existing templates and add some new ones. I grew increasingly frustrated when I would try to use a template I created on my work machine, and not have access to it when I was coding at home. As luck would have it, there is a very simple solution to sharing these custom templates between computers.
Live Mesh – Your digital life, always with you
 | |
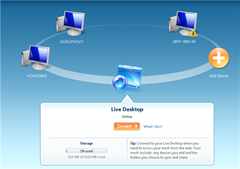
| Microsoft has offered free “cloud syncing” services for a few years now – if you haven’t taken advantage of this, start today. One of these services is called Live Mesh. Live Mesh can be installed on your PC, Mac, and Windows phone, and seamlessly sync a “virtual desktop” on all of these devices. A change to a file on one device, or adding and deleting a file, will publish the changes to the cloud allowing all other devices to sync up with the current file structure. For a developer, this opens up a lot of possibilities: storing source code you want to be able to pull down wherever you are; storing utility assemblies like RhinoMocks, Unity, StructureMap, and any VS debugger visualizers; or tools like Reflector or nDepend; or, you guessed it, ReSharper templates. |
Export your Existing Templates
 | |
| Now that you’ve installed Live Mesh and synced your live desktop to your machine, configuring ReSharper to access your shared templates couldn’t be easier. | |
| If you have already created some ReSharper templates, you need to export them first. In the ReSharper Template Explorer, click on the “Export…” toolbar button. Save this XML file into a folder in your Live Mesh desktop. This will make sure that the file is accessible in your live mesh, and automatically synced in the cloud when it changes. |
Configure ReSharper on your development machines
| | | |———————————————————————————————————————————————————————————————————————————————————————–|——————————————————————————————————————————————————————————————————————————————————————————————-| |  | In the ReSharper Templates Explorer, there is another toolbar button to “Mounting File Storage…” This button will open a File Open dialog looking for a ReSharper Live Templates XML file.
Simply select the file that you exported into your Live Mesh desktop.
ReSharper will import all the templates, and when you create new templates (or change existing ones) it will automatically publish the file changes to the cloud. Now, when you open Visual Studio on any other computer, all your ReSharper templates will be readily accessible to you! |


Leave a Comment