
RealWorldWPDev Part 4: The Panorama
Series Introduction and Outline
This series is going to walk through building a polished, functioning Windows Phone app from start to finish. The app is called Realworld Stocks and the full source code will be available on CodePlex as the series progresses. I’ll be using Mercurial to encourage forking and maybe even pull requests from developers who want to contribute their own real-world solutions.
View the Series Introduction and Outline
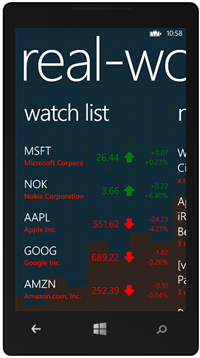
The windows phone panorama
Many apps lend themselves nicely to a Windows Phone Panorama. CTA Watch looks similar but it’s actually a Pivot with a background image. After going back and forth for a bit with Real-world Stocks I decided that the panorama looked pretty nice and went with it.
Thanks again @Templarian for the background! Be sure to hit him up if you’re in need of a great designer who actually gets metro!
This post is going to cover a lot of topics so I will do my best to whet your appetite, but please be sure to Download the Code and check out the app for yourself! The code should be pretty easy to follow as you get more familiar with how Caliburn does things.
What helps make a great experience?
- Lazy load sections after the user has swiped to them
- Panorama animations take ~0.5 seconds; don’t run your code until the animation is finished to prevent stuttering
- Show a nice BusyIndictator with friendly messages for each panorama section
- Customize the app bar buttons depending on which panorama section is active
- The News section show time relative dates (just now, 2 hours ago, etc)
Disclaimer
This entire series assumes a basic understanding of Silverlight and MVVM. If you aren’t familiar with these topics then I am hopeful that you can still follow along, but you may need to do some further reading outside of this to cover the fundamentals and framework primitives. That said, the following post is going to remain fairly high level and try to let the source code speak for itself. I am intentionally not going to deep-dive into topics that are covered elsewhere.
Documentation
Caliburn.Micro has great documentation. Check out the following links if you’re looking to deep dive into anything covered here.
MVVM Recap
MVVM is covered everywhere, so all I will say about here is the following – it stands for Model-View-ViewModel.
- ViewModels are just regular classes. In Caliburn many of them inherit from Screen. They provide the logic for your View, including what data should be displayed, and what code should execute when actions are taken on the view (like Button clicks)
- Views are your standard XAML artifacts, like Pages and UserControls. In MVVM they rely heavily on the rich Binding support in XAML/Silverlight to interact with the ViewModel that it is bound to.
- Model is everything else.
The Anatomy of the HomeViewModel
Now then, the HomeViewModel is a great starting point. At the time of the writing you can see the full HomeViewModel source. It’s actually a pretty simple class for doing a whole lot of stuff for us. Let’s dissect this bad boy.
public class HomeViewModel : Conductor<IScreen>.Collection.OneActive, IRefreshable, IAppBarController
{
    private readonly INavigationService _navigation;

    public HomeViewModel(INavigationService navigation, HomeWatchListViewModel watchList, HomeNewsViewModel news,
                            HomeQuoteViewModel quote)
    {
        _navigation = navigation;
        Items.Add(watchList);
        Items.Add(news);
        Items.Add(quote);
    }
}
Conductor
A Panorama is normally comprised of 3-4 individual panes. Most of the time these panes are completely isolated and have nothing to do with each other; aside from being housed within the same container. If you actually think about it like that, then you can come up with some highly maintainable and extensible designs.
Rather than creating one giant HomeViewModel that is responsible for controlling every single out of those panes, let’s instead give our HomeViewModel the responsibility it deserves: conducting each of these panes.
You’ll notice that HomeViewModel inherits from Conductor<IScreen>. This provides some great infrastructure for us right out of the box. First up, it exposes a property from the base class of time IObservableCollectio<IScreen> called Items. In the code above, we are using this Items collection to add our Children View Models. It also handled Activation of our child items, telling them what to Initialize themselves – this lends itself amazingly to lazy loading the panorama panes, discussed at the end of this post.
How is this used in HomeView.xaml?
So we have a HomeViewModel, with an Items property that now contains 3 other ViewModels. How exactly is this used in our view? In 2 ways:
- The Panorama control inherits from ItemsControl, which means it supports binding to collections just like a ListBox does. In the end, since our “Items” are just ViewModels themselves, they are in turn rendered as Views in the Panorama. This concept is the basis of known as building Composite Views.
- No ItemsSource=”{Binding Items}”?? You may notice there is no explicit binding in the XAML below – Caliburn is a Convention over Configuration framework (if you want it to be!). This means it will by default use its x:Name and look for a property on the ViewModel that it can bind itself to. If you prefer to explicitly bind your Views then please do so! The conventions are entirely optional.
<controls:Panorama x:Name="Items" Title="{StaticResource AppNameUpper}">
    <controls:Panorama.HeaderTemplate>
        <DataTemplate>
            <TextBlock Text="{Binding DisplayName}" />
        </DataTemplate>
    </controls:Panorama.HeaderTemplate>
</controls:Panorama>
IOC / Constructor Injection
Now you might be wondering, in the HomeView I just created a constructor that takes 4 parameters, INavigationService, HomeWatchListViewModel, HomeNewsViewModel, and HomeQuotesViewModel.
When our HomeView.xaml is loaded, what is creating our HomeViewModel for us, and more importantly, how did it know how to pass these parameters to our constructor?
This concept is known as Inversion of Control. Our HomeViewModel relies on other classes to complete it’s job, but rather than being responsible for creating these dependencies itself, it externalizes that responsibility and simply declares ‘hey, I need these things! Framework, you give them to me!’
When you create new ViewModels and other services, you just need to register them in your AppBootstrapper. A snippet can be seen below. Once these ViewModels are registered in the Bootstrapper, Caliburn will take care of the rest.
public class AppBootstrapper : PhoneBootstrapper
{
    private PhoneContainer _container;

    protected override void Configure()
    {
        LogManager.GetLog = type => new DebugLog();

        _container = new PhoneContainer(RootFrame);
        _container.RegisterPhoneServices();

        _container.Singleton<IStocksWebService, StocksWebService>();


        _container.Singleton<HomeViewModel>();
        _container.Singleton<HomeNewsViewModel>();
        _container.Singleton<HomeWatchListViewModel>();
        _container.Singleton<HomeQuoteViewModel>();
    }
}
Let’s Talk Polish
The following concepts were used to create the full Panorama experience seen in the YouTube video. You may need to watch it more than once to notice the subtle attention to detail.
BusyIndicator
Mango improved panoramas in many ways. For one, the System Tray now has an Opacity property, so you can finally show the tray in a full screen panorama and it still looks great. Another big improvement is the native ProgressIndicator experience. It’s built into the SystemTray and interacts excellently to the rest of the tray, like hiding the loading message when the user taps it to see the clock. It also has some great out of the box animations.
For our app I wanted a global hook into the ProgressIndicator from my ViewModels. To do so, I created a simple BusyIndicator.Show() method which hooks right into the System Tray. You can use this API directly from your ViewModel in a very simple fashion.
I will be going more into the BusyIndicator in a future post.
public void RefreshData()
{
    BusyIndictator.Show("Loading watch list...");
    ThreadPool.QueueUserWorkItem(callback =>
    {
        Coroutine.BeginExecute(UpdateWatchList().GetEnumerator());
    });
}
IRefreshable
Refreshing data is very common in these types of apps. Acknowledging this I decided to create a simple IRefreshable interface, which in our Conductor’s case, simply delegates along to the ActiveItem (the currently active panorama pane ViewModel) and says “Hey, do you know how to refresh data? If so, please proceed to do!”
public void RefreshData()
{
    var refreshableChild = ActiveItem as IRefreshable;
    if (refreshableChild != null)
        refreshableChild.RefreshData();
}
Then, in the HomeWatchListViewModel for example, it also implements IRefreshable, and proceeds to refresh the current Watch List.
This is another example of compositing pieces together to write really extensible code as our app progresses.
public class HomeWatchListViewModel : Screen, IRefreshable
{
    public void RefreshData()
    {
        BusyIndictator.Show("Loading watch list...");
        ThreadPool.QueueUserWorkItem(callback =>
        {
            Coroutine.BeginExecute(UpdateWatchList().GetEnumerator());
        });
    }
}
Polishing up the AppBar
If you look closely at the video, you will notice some careful consideration we needed on our home screen. Each swipe of the panorama changes the ApplicationBar in some way.
- Watch List shows 2 app bar buttons: Add and Refresh
- News shows only 1 app bar button: Refresh
- Lookup shows 0 app bar buttons, and it set it’s Mode to Minimized
In order to achieve this I created a simple IAppBarController interface and an AppBarHelper class. To try and keep this post from getting too long I will be dedicating an entire article to this topic soon. In the mean time, please see the code if you want to see how it works!
WatermarkedTextbox and PriceChangeArrow
Again a keen eye may have noticed 2 other niceties on the home screen:
- PriceChangeArrow – the price change arrow (showing positive or negative gains) had a little animation when the Watch List loaded. It’s a little thing but I think goes a long way to making the app feel polished and enjoyable. I will be blogging exactly how to create such a control in the future.
- WatermarkedTextBox – this control I found from an open source Silverlight project and improved it a bit for Mango. I will be blogging in more detail about this control in the future.
Lazy Loading the Panorama Panes and Keeping the Animations Fluid!
This is perhaps the most important part of the home screen, so I’m not entirely sure why I left it ‘til the end. In any event, high framerates are very important, and maintaining a nice fluid user experience throughout the app is crucial to getting those coveted 5-star rating.
Caliburn Screens have a few important methods that you will want to override to make your app do something.
- OnInitialize – Override this method to add logic which should execute only the first time that the screen is activated. After initialization is complete, IsInitialized will be true.
- OnActivate – Override this method to add logic which should execute every time the screen is activated. After activation is complete, IsActive will be true.
- OnDeactivate – Override this method to add custom logic which should be executed whenever the screen is deactivated or closed. The bool property will indicated if the deactivation is actually a close. After deactivation is complete, IsActive will be false.
- OnViewLoaded – Since Screen implements IViewAware, it takes this as an opportunity to let you know when your view’s Loaded event is fired. Use this if you are following a SupervisingController or PassiveView style and you need to work with the view. This is also a place to put view model logic which may be dependent on the presence of a view even though you may not be working with the view directly.
Read more about Screens, Conductors, and Composition
In addition to the above events, a while ago I came up with OnViewReady and submitted the patch to Rob. The idea is simple: fire after OnViewLoaded, but also after the first LayoutUpdated; meaning the base UI is rendered, so feel free to start doing hogging CPU! By waiting until OnViewReady you make sure that your code doesn’t start running and burning precious CPU cycles while the platform is trying to finish starting up (and animating things into view, like the panorama).
Workaround to OnViewReady
At the time of this writing, in the 1.2 NuGet package, I could not get it to behave correctly, so instead opted for a slightly uglier workaround. Essentially this creates a background thread, and then sleeps for 1 second in that thread, before starting to work. 1 second should be plenty of time for any base loading and animations to complete.
protected override void OnInitialize()
{
    RefreshData();
}

public void RefreshData()
{
    BusyIndictator.Show("Loading watch list...");

    // TODO: Move this to OnViewReady in CM 1.3
    // For now sleep for a bit to let the panorama load smoothly
    ThreadPool.QueueUserWorkItem(callback =>
    {
        Thread.Sleep(1000);
        Coroutine.BeginExecute(UpdateWatchList().GetEnumerator());
    });
}
Summary
Kudos if you followed all of that! This one took me a little while to write and contains a lot of stuff, but it also leaves the door open for a whole lot more to talk about in the future!
Please post any questions you have here, and again, please pull down the code and follow along as we go. Feedback is greatly appreciated!


Leave a Comment